Cisco Configuration Professional (Cisco CP) is a software tool that can be used to configure and manage standalone network devices or groups of devices.
The advantage of Cisco CP is that it simplifies configuration of Cisco access routers through graphical user interface (GUI) based easy-to-use wizards. Among the features you can configure using Cisco CP are routing, firewall, intrusion prevention system (IPS), VPN, unified communications, WAN, and LAN. Cisco CP can also be used to monitor router status and troubleshoot WAN and VPN connectivity issues. We are going to experience firsthand in a moment all this and more that can be done using Cisco CP.
In addition to replacing command line interface (CLI) with graphical user interface (GUI) for ease of configuration, Cisco CP also provides additional tools to make router deployments more efficient. These additional tools offer a one-click router lockdown and voice and security auditing capability to check and recommend changes to router configuration. Cisco CP can also monitor status of a router and troubleshoot WAN and VPN connectivity issues.
Cisco Configuration Professional Express (Cisco CP Express) is a light weight version of Cisco CP. Cisco CP Express along with a factory default configuration file are already installed in flash memory of routers that are shipped with Cisco CP. It means you can simply unpack the device and connect a PC directly to it, and then use the pre-installed Cisco CP Express to configure the device. We will cover the full version of Cisco CP here that you can install as an application on a Windows based computer.

Cisco Configuration Professional is due to replace Cisco Security Device Manager (SDM) over time. CCP communications are pretty secure as it uses secure protocols such as Secure Shell Protocol (SSH) and HTTPS to communicate with the devices.
Newly shipped Cisco routers do not have any configuration pre-loaded which means you have to connect a console cable to the console port and use terminal emulation software like Hyper Terminal to do initial configuration of the router. But, devices shipped with Cisco CP do have a default configuration that allows you to connect a PC to an Ethernet port on the device and start configuring it right away.
Let’s start by installing Cisco CP 2.5 on a Windows based computer. You should have the installation package in the form of a file such as cisco-config-pro-k9-pkg-2_5-en.exe which you launch to start the installation process.
Figure 9-6 Cisco Configuration Professional Installation
The installation is pretty straightforward and takes less than a minute to complete.
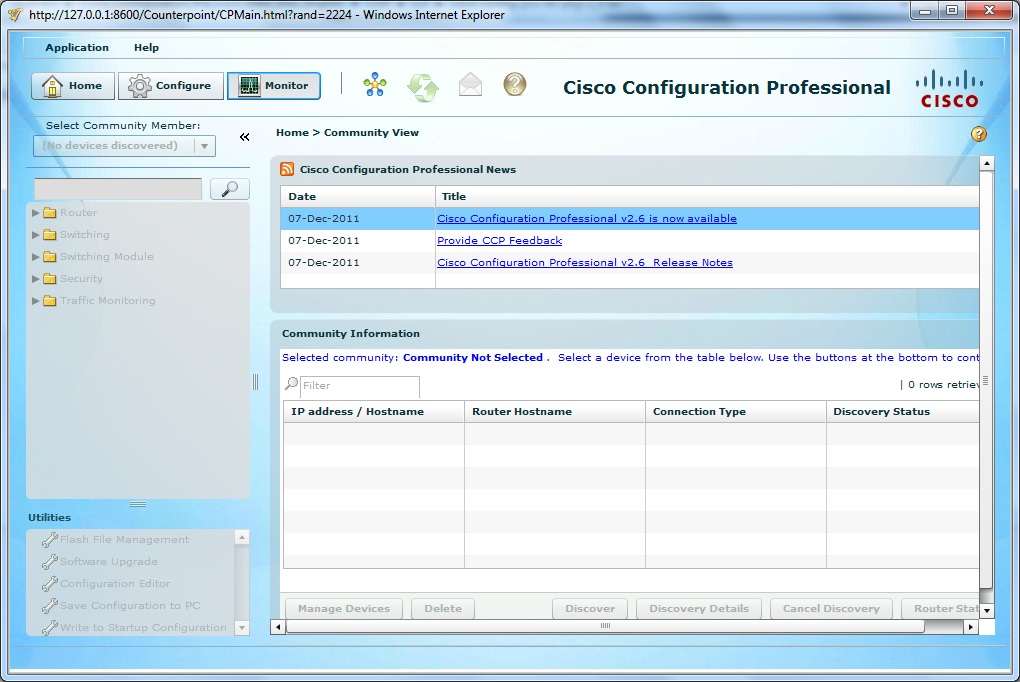
You can launch the application after finalizing the installation and you may be prompted to select / manage a community of devices as the application loads. You can safely cancel this dialogue box initially and reach the main application window which for version 2.5 looks like the figure below.
Figure 9-7 Cisco Configuration Professional Main Window
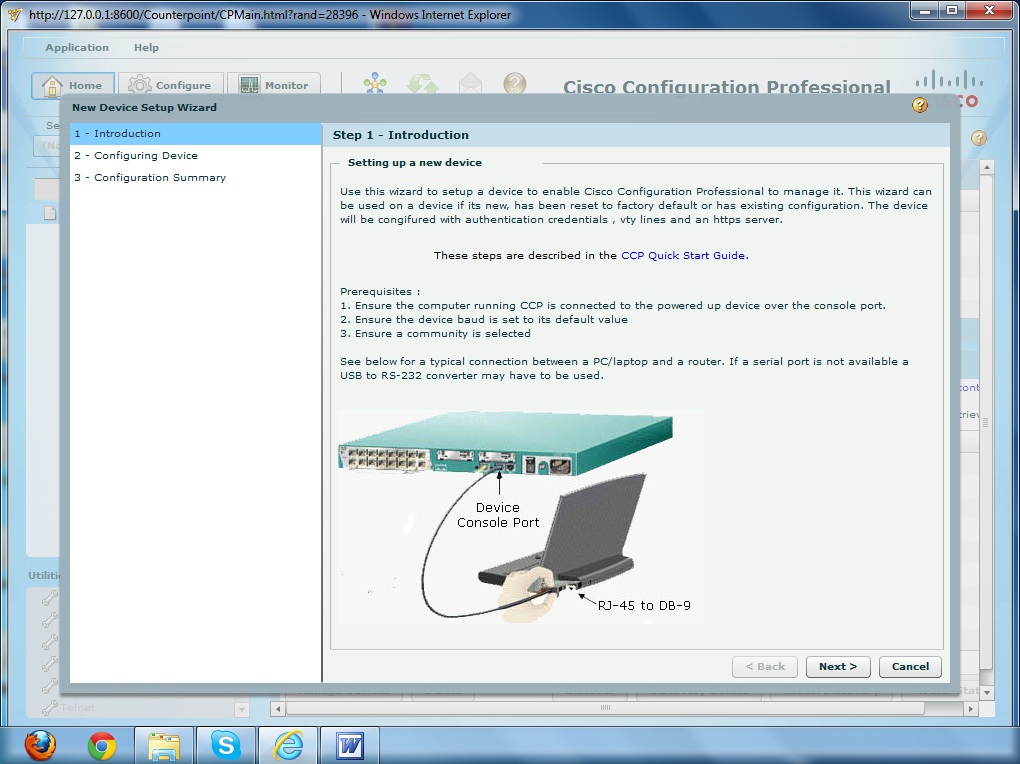
We will set up a single device, a newly shipped Cisco 881 router, to be managed using Cisco Configuration Professional. The computer on which you just installed Cisco CP should be connected to the console port of the router through its serial port. If your computer does not have a serial port, you can use an USB/RS-232 adapter to connect to the router console. After ensuring physical connectivity, go to the Application menu and click on Setup New Device…. You see a screen similar to below figure.
Figure 9-8 New Device Setup Wizard – Step 1
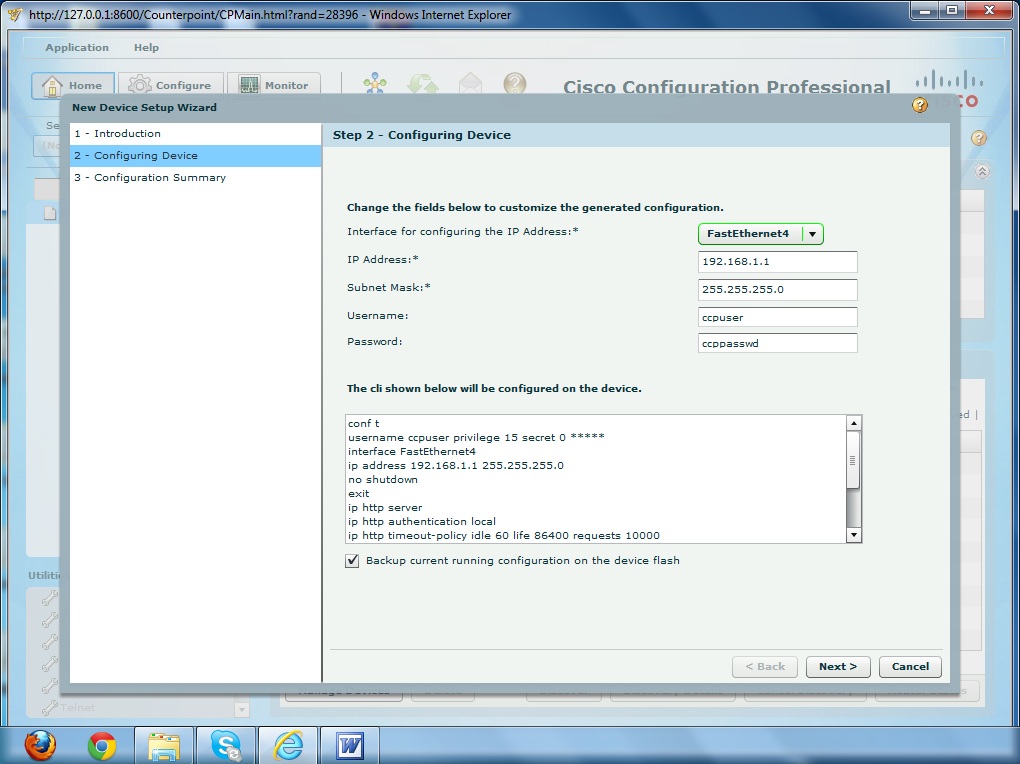
Simply press Next to move to Step 2 – Configuring Device where you can enter IP addresses for available interfaces. In our case, we configure IP address 192.168.1.1 on interface FastEthernet4 of our Cisco 881 and press Next.
Figure 9-9 New Device Setup Wizard – Step 2
If everything goes well, you reach Step 3 – Configuration Summary as shown in the figure below.
Figure 9-10 New Device Setup Wizard – Step 3
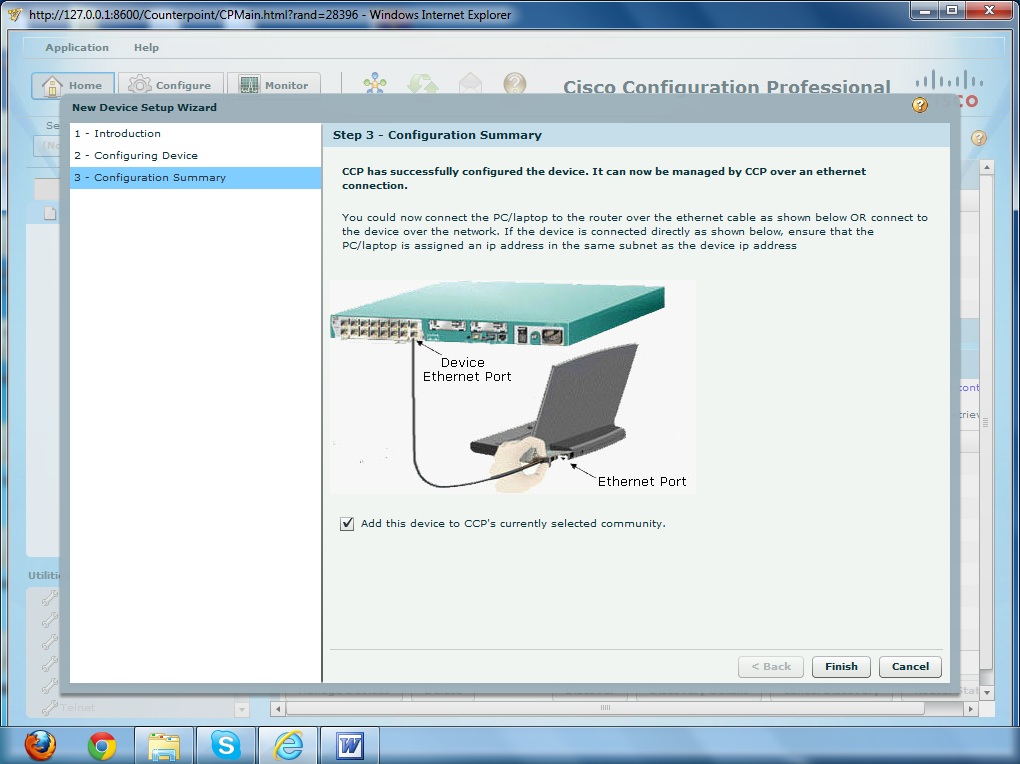
What we have done so far is to configure IP address 192.168.23.1 on interface FastEthernet4 of the router. Now you should connect the Ethernet port of your computer to interface FastEthernet4 of the router using a crossover Ethernet cable.
At this stage the main application window would look something like this:
Figure 9-11 New Device – Not Discovered
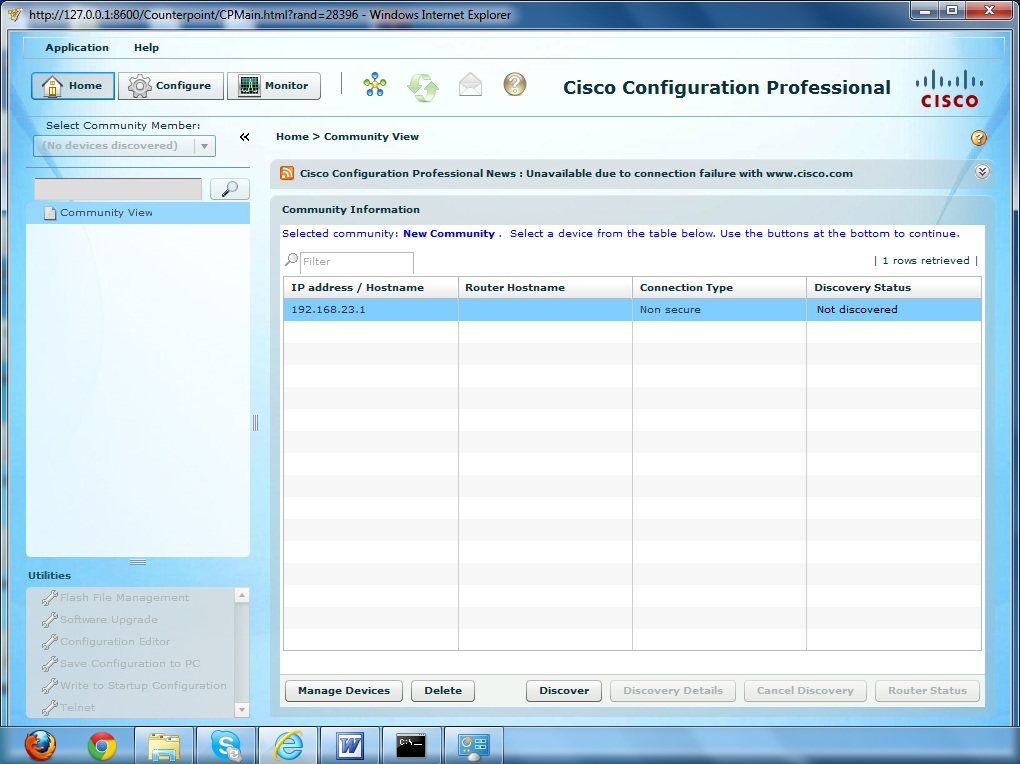
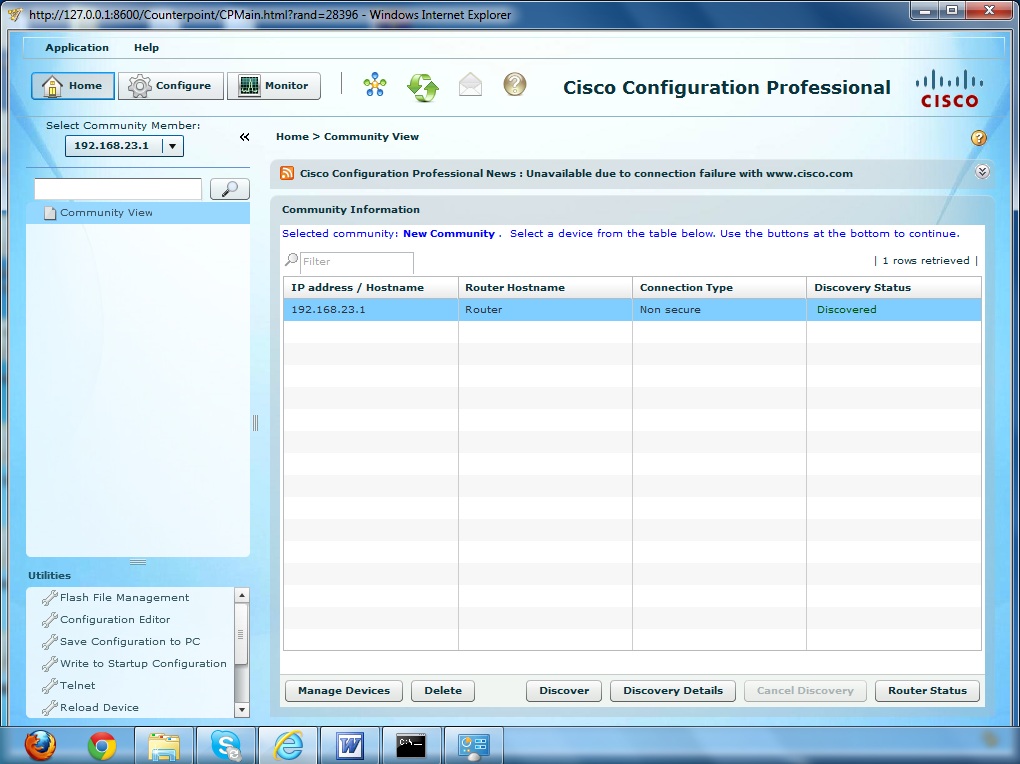
We highlight the IP address 192.168.23.1 we configured and press Discover. Cisco CP will not try to connect to the router over the Ethernet interface and if all goes well the Discovery Status should change to Discovered as shown in figure below.
Figure 9-12 New Device – Discovered
At this stage the router is fully set up with Cisco Configuration Professional and we can configure it using easy-to-use wizards by pressing the Configure in the top left area of the display. Some new entries appear in the left pane of the display as shown in Figure 9-13.
Figure 9-13 New Device – Configuration
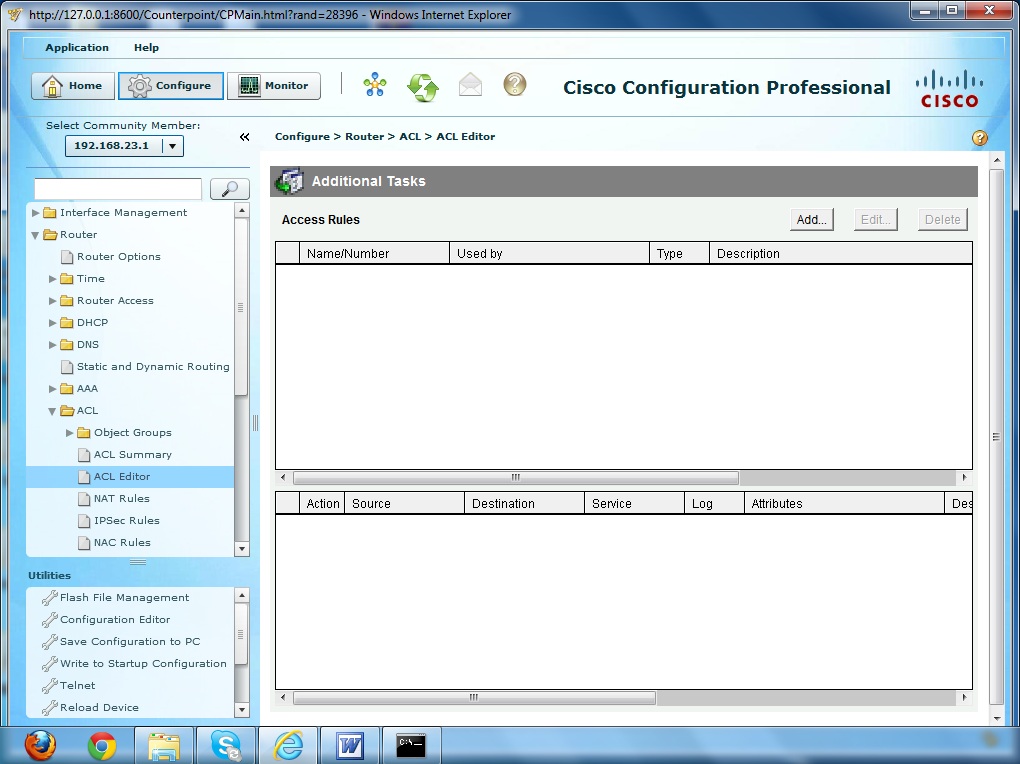
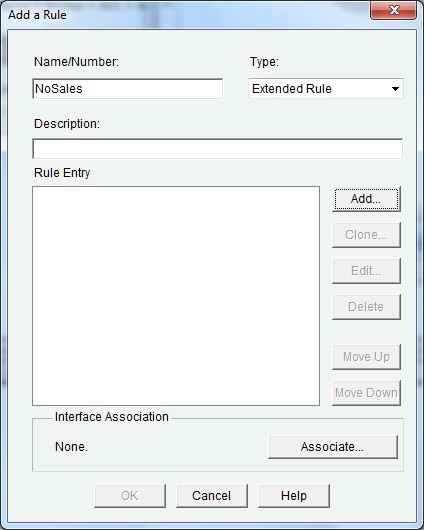
We will re-create the named extended access list NoSales this time using CCP GUI wizard. We created the same access list earlier in the chapter using command-line interface (CLI). Go to Router > ACL > ACL Editor in the left pane and press Add… to get the dialogue box shown in Figure 9-14, which can be used to enter and apply access lists as required. In this dialogue box you supply a name and specify that it is an extended ACL, and then press Add to create the first access list statement.
Figure 9-14 Dialogue – Add a Rule
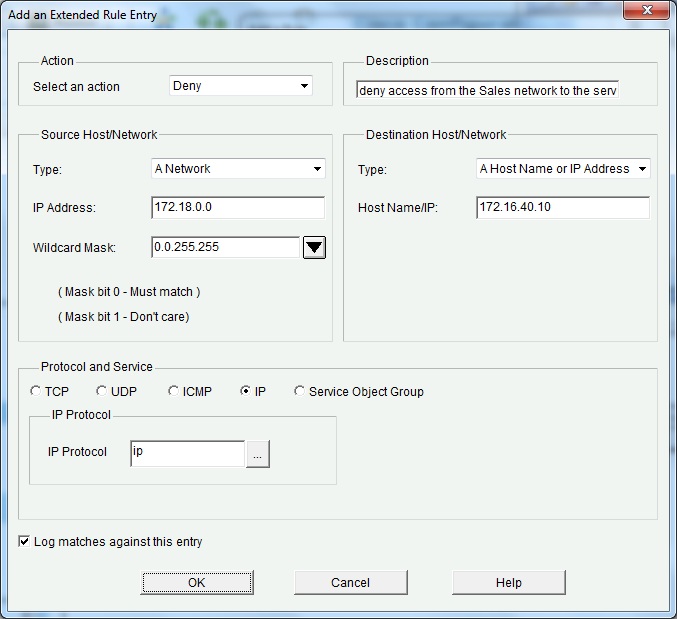
We now creat the first access list statement as shown in Figure 9-15 and press OK to proceed.
Figure 9-15 Dialogue – Add an Extended Rule Entry 1
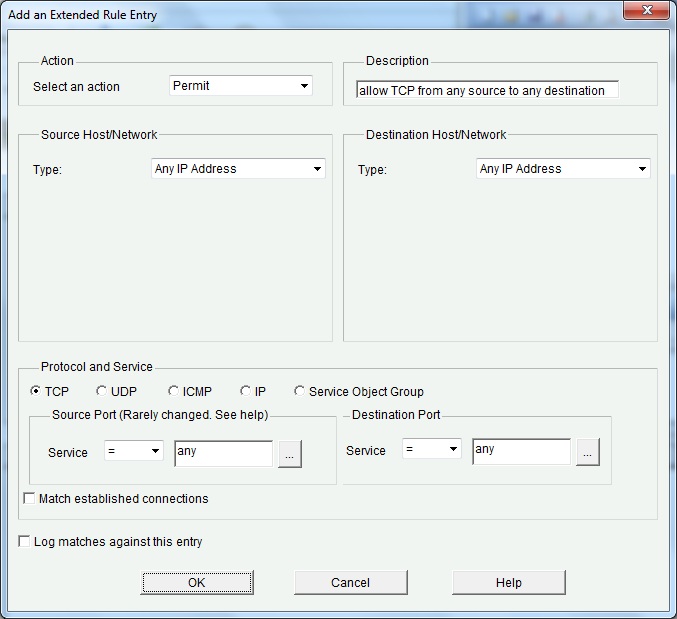
In the same fashion we create the second access list statement as shown in Figure 9-16.
Figure 9-16 Dialogue – Add an Extended Rule Entry 2
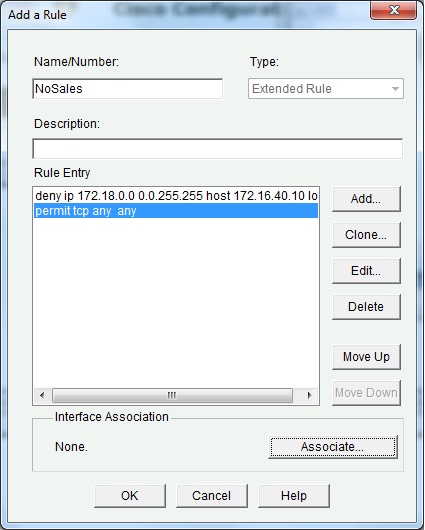
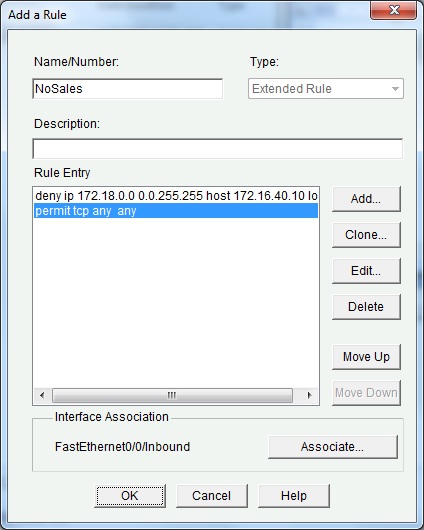
The access list has been created by now as shown in Figure 9-17, and we need to apply it to an interface. Press Associate to proceed.
Figure 9-17 Dialogue – Add a Rule
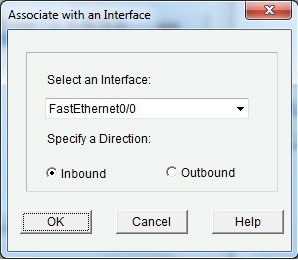
We apply the access list to interface FastEthernet0/0 in the inbound direction, as shown in Figure 9-18.
Figure 9-18 Dialogue – Associate with an Interface
The configuration is complete and you return to the Add a Rule dialogue box, as shown in Figure 9-19. Simply press OK to proceed.
Figure 9-19 Dialogue – Add a Rule
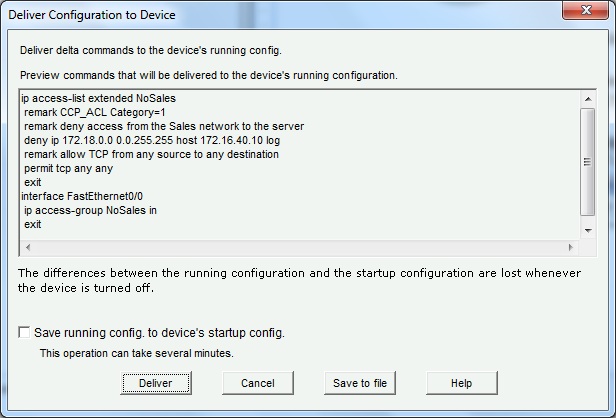
Another box appears that displays configuration that would actually be applied to the router, as shown in Figure 9-20. You can see that the configuration that actually gets applied to the router is just the same we created in an earlier section of the chapter. Press Deliver to apply the configuration to the running configuration. You may choose to select the Save running config to device’s startup config checkbox to save the running configuration to startup configuration as well.
Figure 9-20 Dialogue – Deliver Configuration to Device
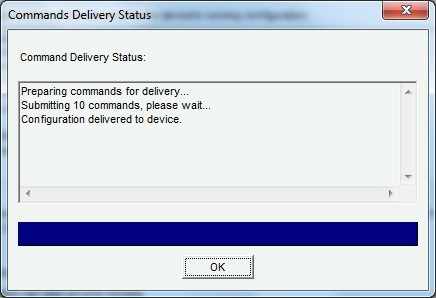
Command delivery status looks good, as shown in Figure 9-20. We’re done with creating an access list using Cisco Configuration Professional. You may press OK to return to the main application window.
Figure 9-20 Command Delivery Status
Once you have come this far setting up Cisco Configuration Professional, it is a good idea to explore the configuration options available. It would be fun and a great way to learn Cisco CP while doing so. You are sure to get amazed with what you can do with Cisco CP with minimal knowledge of the Cisco CLI.
Summary
We dedicated this chapter almost exclusively to access control lists (ACLs). Access lists are generally used for traffic filtering but they are quite versatile and have several other uses as well that were briefly mentioned in the beginning of the chapter
We covered both standard and extended access lists in detail and learned how to configure them in both named and numbered formats. Several nuances of access lists were also covered from a practical standpoint.
The chapter concluded with coverage of Cisco Configuration Professional (Cisco CP), a GUI based tool that can be used to configure and manage Cisco devices.